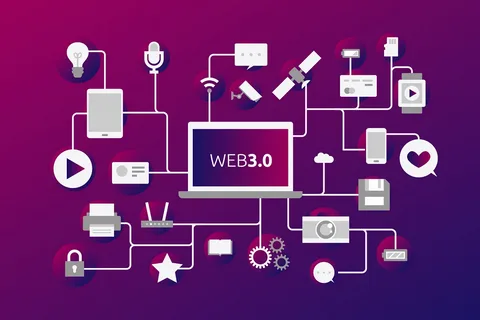
Welcome to the future of the internet, where Web3 is revolutionizing the way we interact with digital platforms. Imagine building your own Web3 app without writing a single line of code. Sounds impossible? Well, it’s not. With the advent of various no-code platforms and tools, you can now create sophisticated Web3 applications with ease. In this guide, we’ll walk you through seven steps to build a Web3 app with no coding skills, leveraging the best web3 development services available.
1. Understand the Basics of Web3
Before diving into the development process, it’s crucial to understand what Web3 is. Web3 represents the third generation of the internet, where decentralized applications (dApps) run on blockchain technology. Unlike Web2, which relies on centralized servers, Web3 operates on peer-to-peer networks, ensuring transparency, security, and user control. Familiarize yourself with key concepts such as blockchain, smart contracts, and decentralized finance (DeFi).
Latest Insight: According to ConsenSys, Web3 is expected to attract over a billion users by 2030, thanks to its decentralized nature and enhanced security features.
2. Choose the Right No-Code Platform
To build your Web3 app without coding, you’ll need a reliable no-code platform that supports blockchain integration. Some popular options include:
- Bubble: A versatile no-code platform that allows you to create dApps using visual programming.
- Webflow: Known for its design capabilities, Webflow also offers integrations for blockchain technology.
- Alchemy: This platform provides powerful APIs for building blockchain applications without writing code.
Evaluate these platforms based on your project requirements, ease of use, and available features. Many web3 development services also offer specialized no-code solutions.
3. Define Your App’s Purpose and Features
Next, clearly define the purpose of your Web3 app and list its key features. Are you building a DeFi platform, an NFT marketplace, or a decentralized social network? Outline your app’s functionality, user flow, and key features. This will serve as a blueprint for your development process.
Example: If you’re building an NFT marketplace, your features might include user registration, NFT minting, a marketplace for buying and selling NFTs, and a digital wallet for transactions.
4. Design Your User Interface (UI)
A user-friendly and visually appealing interface is crucial for the success of any app. Use the design capabilities of your chosen no-code platform to create a seamless UI. Focus on:
- Navigation: Ensure users can easily navigate through the app.
- Responsiveness: Design your app to work smoothly on different devices.
- Aesthetics: Use appealing color schemes, fonts, and layouts to enhance user experience.
Tools like Figma and Adobe XD can help you design wireframes and prototypes before implementing them on your no-code platform.
5. Integrate Blockchain Features
Now comes the exciting part – integrating blockchain features into your app. Most no-code platforms provide pre-built modules and APIs for blockchain functionalities. Key integrations include:
- Smart Contracts: Use platforms like Ethereum or Binance Smart Chain to deploy smart contracts that automate transactions and enforce rules.
- Wallet Integration: Enable users to connect their digital wallets (e.g., MetaMask) for secure transactions.
- Tokenization: Create and manage tokens (e.g., NFTs) within your app.
Latest Insight: According to Dapp Radar, the number of dApps has grown by 264% year-over-year, reflecting the increasing demand for decentralized applications.
6. Test Your App Thoroughly
Testing is a critical step to ensure your app functions correctly and provides a seamless user experience. Conduct both functional and non-functional testing, focusing on:
- Functionality: Verify that all features work as intended.
- Usability: Ensure the app is easy to use and navigate.
- Performance: Check the app’s responsiveness and load times.
Engage beta testers to gather feedback and identify any issues before the official launch.
7. Launch and Promote Your Web3 App
Once your app is tested and ready, it’s time to launch. Publish your Web3 app on relevant platforms and start promoting it. Use various marketing strategies to reach your target audience, such as:
- Social Media Marketing: Leverage platforms like Twitter, LinkedIn, and Reddit to build a community around your app.
- Content Marketing: Create engaging content (blogs, videos, tutorials) to educate users about your app and its benefits.
- Partnerships: Collaborate with influencers and other Web3 projects to expand your reach.
Call to Action (CTA): Ready to transform your idea into a revolutionary Web3 app? Discover how our expert web3 development solutions can help you build, launch, and scale your project effortlessly. Contact us today for a free consultation and start your Web3 journey with confidence!
Conclusion
Building a Web3 a / /pp without coding skills is now within your reach, thanks to the rise of no-code platforms and tools. By following these seven steps – understanding Web3, choosing the right platform, defining your app’s purpose, designing the UI, integrating blockchain features, testing, and launching – you can create a successful Web3 application. Stay updated with the latest trends and leverage professional web3 development services to ensure your app stands out in this rapidly evolving digital landscape.
